

App extensions allow you to perform various actions without running an app: share photos on Facebook, send files as an e-mail attachment or open an article. If you are developing an iPhone app and want to find out more, keep reading and learn how to add extensions to iOS apps!
I prepared a series of four articles that take up the issue of creating an app that serves to store and display a list of files. Maybe it doesn’t sound too fascinating, but trust me: it can be very useful.
Kickstart our iPhone app development
First we will need to create a project. To do that run the Xcode environment and select: File/New/Project…
Next, mark iOS/Application/Single View Application and click the “Next” button.
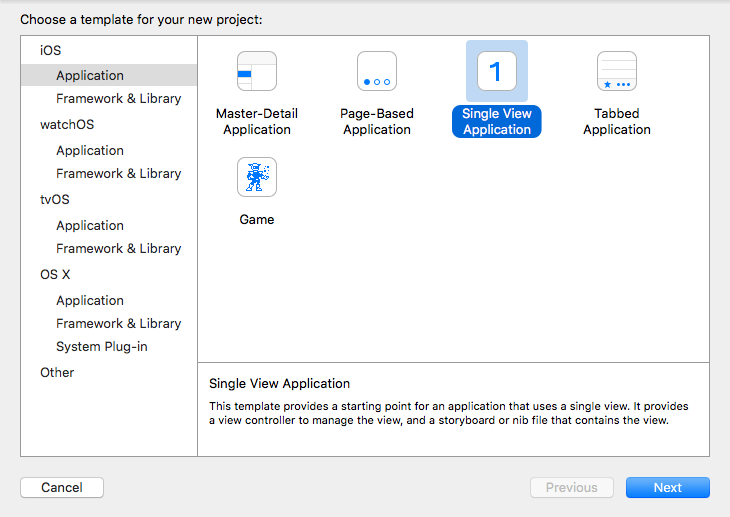
Creating the project
Name the app and select “Swift language”. Click the “Next” button and select a localization to save your project.

Setting project options
After creating the project, a workspace with an open settings file should display. At this moment we don’t change anything unless we want a different Deployment Target (if so, remember that it can’t be lower than 8.0).

Settings
Creating the iOS application view
Now, we can create the main app view, in other words, a chart which will display saved files.
Move on to the Main.storyboard file, then add Table View controller to the already existing View controller and add all constraints with a 0 value so that the chart fills our whole view.

Creating the iOS application view
Open the ViewController.swift file in Assistant Editor and add an outlet to our table.

Adding an outlet to the table
Now we should move on to the implementation of proper delegates to the chart and files display mode but first, prepare needed elements to fill our table.
How to add extensions to iOS apps
First off, we have to add the extension to iOS app and then we’ll enable access to the shared resources. Select from the menu File/New/Target…
A window, from which you can select the extension type, should display now. Select the first one, Action Extension, and click the “Next” button.
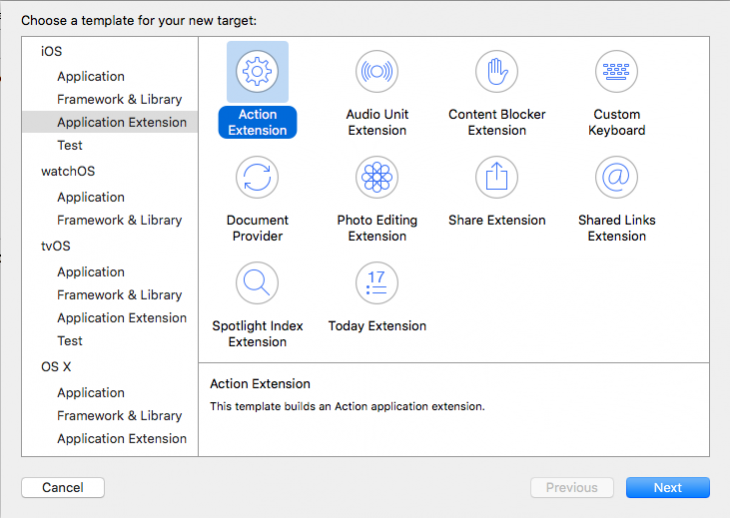
The extension type
In the next window, choose the extension name. In my case it is the app name with added “Action” at the end of it (to suggest the extension type). If we want an individual style while using the extension, we have to leave the chosen Action Type on the Present User Interface. Click the “Finish” button to approve it.
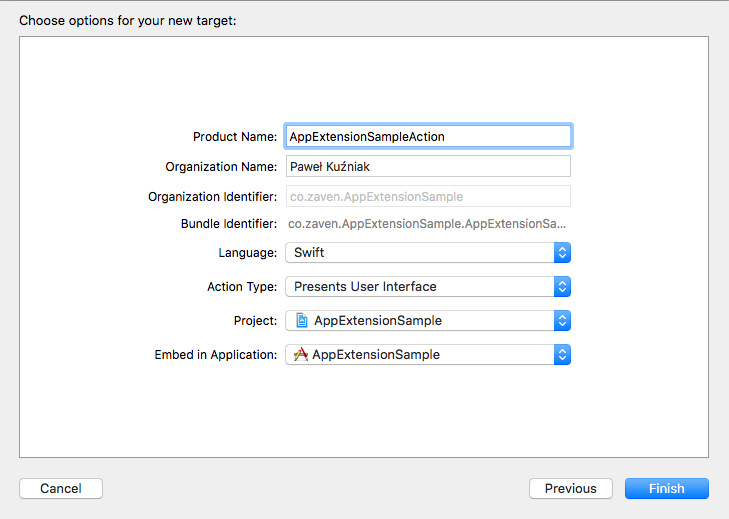
The extension settings
The Target we’ve added should appear in our project settings. In the explorer we can see a directory with the extension name and its files.

Directory with the new extension
Next on “How to add extensions to iOS apps”:
- enable sharing of the application resources
- create a manager for saving and reading files
Sources:
Photo by James Broad
YOU CAN HAVE A LOOK AT THE FINISHED APP IN OUR GITHUB REPO HERE.
Popular posts

From Hype to Hard Hats: Practical Use Cases for AI chatbots in Construction and Proptech.
Remember the multimedia craze in the early 2000s? It was everywhere, but did it truly revolutionize our lives? Probably not. Today, it feels like every piece of software is labeled "AI-powered." It's easy to dismiss AI chatbots in construction as just another tech fad.
Read more
Fears surrounding external support. How to address concerns about outsourcing software development?
Whether you’ve had bad experiences in the past or no experience at all, there will always be fears underlying your decision to outsource software development.
Read more
What do you actually seek from external support? Identify what’s preventing you from completing a project on time and within budget
Let’s make it clear: if the capabilities are there, a project is best delivered internally. Sometimes, however, we are missing certain capabilities that are required to deliver said project in a realistic timeline. These may be related to skills (e.g. technical expertise, domain experience), budget (hiring locally is too expensive) or just capacity (not enough manpower). What are good reasons for outsourcing software development?
Read more
